How to Do Kappagen in Streamerbot Twitch Obs: Step-by-Step Guide
Kappagen is a fun way to add excitement to your Twitch stream. It makes your chat more interactive and engaging.
Want to learn how to do Kappagen in Streamerbot with Twitch OBS? You are in the right place. Kappagen is a popular feature that lets you create a flood of emotes on your screen. It is a great way to celebrate moments and engage viewers.
Streamerbot, combined with Twitch OBS, makes this easy. In this guide, we will walk you through the steps to set it up. You do not need to be a tech expert. Just follow our instructions, and you will have Kappagen working in no time. Get ready to make your streams more lively and fun!
Setting Up Streamerbot
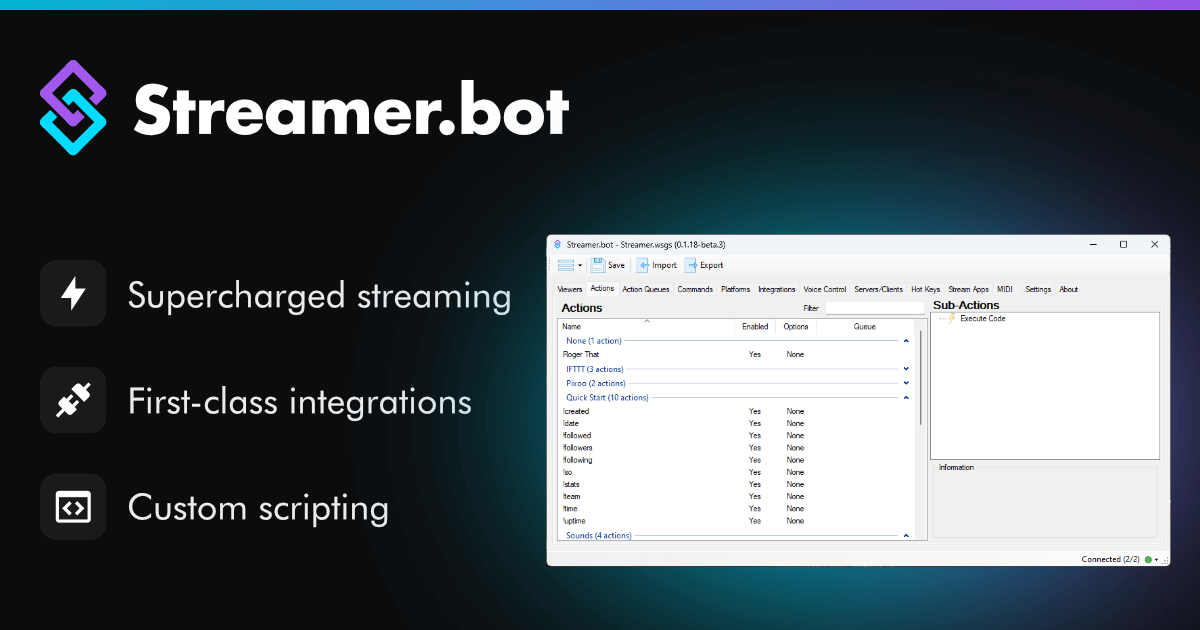
Are you ready to elevate your Twitch streams with interactive and fun features? Setting up Streamerbot can help you do just that. Today, we will walk you through the steps of downloading and installing Streamerbot so you can start engaging your audience in exciting ways. Let’s get started!
Downloading Streamerbot
First things first, you need to download Streamerbot. Head over to the official Streamerbot website. You’ll find the latest version available for download there.
Once you’re on the website, look for the download button. Clicking it will initiate the download process. Make sure to save the file in an easily accessible location on your computer.
Having trouble finding the download button? Look for a section labeled ‘Downloads’ or ‘Get Streamerbot’. It’s usually pretty prominent!
Installation Process
After downloading, it’s time to install Streamerbot. Navigate to the location where you saved the file and double-click it to start the installation.
A setup wizard will guide you through the installation steps. Follow the on-screen instructions, clicking ‘Next’ until you reach the ‘Finish’ button.
Isn’t it straightforward? Just make sure to read any prompts carefully to avoid missing important information.
Once the installation is complete, launch Streamerbot to begin configuring it for your Twitch streams. Ready for the next step? Your audience will love the interactive elements you’re about to introduce!
Have you ever wondered how some streamers have those cool interactive features? Now, you know the secret—Streamerbot! So, what are you waiting for? Start setting it up and make your streams more engaging than ever before.

Credit: www.youtube.com
Configuring Streamerbot For Twitch
Configuring Streamerbot for Twitch is a vital step for streamers looking to elevate their live streaming experience. Streamerbot acts as your virtual assistant, automating tasks and adding interactive features to your Twitch stream. In this section, we’ll walk you through the process of setting up Streamerbot to work seamlessly with Twitch. This will ensure you can focus more on engaging with your audience and less on manual tasks.
Connecting Streamerbot To Twitch
First things first, you need to connect Streamerbot to your Twitch account. Open Streamerbot and navigate to the settings menu. There, you’ll find an option labeled “Connect to Twitch.”
Click on it, and a new window will pop up asking for your Twitch credentials. Enter your Twitch username and password. Once done, you should see a confirmation message indicating that Streamerbot is now linked to your Twitch account.
This connection is crucial because it allows Streamerbot to interact with your Twitch chat, alerts, and other features. Without this connection, Streamerbot wouldn’t be able to perform its functions effectively.
Authenticating Your Twitch Account
Next, you need to authenticate your Twitch account to ensure Streamerbot has the necessary permissions. This step is essential for security and functionality.
To authenticate, go back to the settings menu in Streamerbot. Look for the “Authentication” tab and click on it. You will be prompted to authorize Streamerbot to access your Twitch account.
Click “Authorize,” and you will be redirected to Twitch’s authorization page. Here, you will see a list of permissions that Streamerbot requires. These may include managing your chat, accessing your stream data, and other essential functions. Click “Allow” to grant these permissions.
Once authorized, you will be redirected back to Streamerbot, and you should see a confirmation message. This step ensures that Streamerbot can fully interact with your Twitch account, making your streaming experience smoother and more interactive.
Configuring Streamerbot for Twitch may seem like a small step, but it can significantly enhance your streaming setup. Have you ever missed an important chat message because you were too focused on gameplay? With Streamerbot, that’s a thing of the past. It’s like having a dedicated assistant, always ready to help you out.
So, what are you waiting for? Get started with Streamerbot today and take your Twitch streaming to the next level!
Setting Up Obs For Kappagen
Set up OBS for Kappagen in Streamerbot for Twitch with ease. Follow simple steps to enhance your stream. Enjoy interactive viewer experiences effortlessly.
Setting up OBS for Kappagen can elevate your Twitch streaming experience. Kappagen allows for fun and interactive chat emotes to explode on your screen, creating a lively atmosphere for your viewers. To get started, you’ll need to set up OBS (Open Broadcaster Software), a powerful tool for broadcasting your stream.Downloading Obs
First, download OBS from the official website. Make sure you choose the correct version for your operating system. OBS supports Windows, macOS, and Linux. Once downloaded, follow the installation prompts. The setup is straightforward, guiding you through each step. After installation, launch OBS and familiarize yourself with its interface. It’s user-friendly, but exploring the different sections will help you get comfortable.Configuring Obs Settings
Next, configure OBS settings to optimize your stream. Start by adjusting the video settings. Set your base (canvas) resolution and output resolution. A common choice is 1920×1080 for HD streaming. Head to the “Output” tab and adjust your bitrate. A higher bitrate offers better video quality, but requires more upload speed. Typically, 3000-6000 kbps is ideal for 1080p streaming. Don’t forget the audio settings. Select your microphone and desktop audio devices. Ensure levels are balanced to avoid distortion during your stream. Finally, add a new browser source for Kappagen. Copy the URL provided by Streamerbot and paste it into OBS. Adjust the size and position to fit your layout. Have you ever tried using Kappagen in your streams? It can be a game-changer for viewer engagement. Share your experiences and tips in the comments below!Credit: github.com
Integrating Streamerbot With Obs
Streamerbot can be integrated with OBS to enhance Twitch streams. Set up Kappagen to display fun emotes on your screen. Engage viewers with lively visuals effortlessly.
Integrating Streamerbot with OBS can elevate your Twitch streams by adding dynamic elements that engage your audience. Streamerbot, when used with OBS (Open Broadcaster Software), allows you to create interactive and fun experiences for your viewers. Whether it’s automating responses or adding visual effects, the combination can make your streams more lively and entertaining.Adding Streamerbot To Obs
First, you need to add Streamerbot to OBS. Launch OBS and navigate to the “Tools” menu. Select “WebSocket Server Settings” to enable the WebSocket server. Next, open Streamerbot. Go to the “Connections” tab and select “OBS.” Click “Connect” and enter the IP address and port number from the OBS WebSocket settings. Once connected, you can start integrating commands and triggers.Setting Up Commands
Setting up commands in Streamerbot is straightforward. Head to the “Actions” tab in Streamerbot. Click the plus sign to add a new action. Give your action a name that you can easily remember. Now, add the desired command. For instance, if you want to display a Kappa face when someone types “!kappa” in chat, set the command to “!kappa.” Add a “Media Source” in OBS that shows the Kappa face image. Finally, return to Streamerbot and go to the “Triggers” tab. Set the trigger to respond to the “!kappa” command. Link this trigger to the action you created. Now, whenever someone types “!kappa” in chat, the Kappa face will appear on your stream. Integrating Streamerbot with OBS is an exciting way to boost interactivity on your Twitch streams. Have you tried setting up any unique commands or triggers yet? Share your experiences and let us know how it transformed your stream!Creating Kappagen Commands
Creating Kappagen commands in Streamerbot for Twitch and OBS is an exciting way to engage your audience. It allows you to trigger fun, interactive Kappagen events during your stream. Let’s dive into the steps to create these commands effectively.
Defining Kappagen Actions
First, open Streamerbot. Go to the “Actions” tab. Click on “Add Action” to create a new action. Name it something like “Kappagen Action”. This helps in identifying it later. In the action settings, set the type to “OBS”. Then, choose “Run Kappagen Animation”. This will trigger the animation you select.
Next, configure the animation settings. You can choose from various options. These include the number of emotes and the duration. Set these according to your preference. Save the action once you are satisfied.
Testing Commands
After defining the actions, test the commands. Go to the “Commands” tab in Streamerbot. Create a new command. Link it to the action you created. This ensures that the command triggers the Kappagen action.
Test the command in your Twitch chat. Type the command and see if the Kappagen animation starts. If it works, you are all set. If not, check the action and command settings. Ensure everything is configured correctly.
Creating Kappagen commands is a fun way to engage viewers. Follow these steps to set up and test your commands. Enjoy the interaction it brings to your streams.

Credit: www.youtube.com
Customizing Kappagen
Customizing Kappagen in Streamerbot for Twitch Obs can elevate your stream to the next level. It adds a personal touch that resonates with your audience. Let’s walk through some ways you can customize Kappagen to match your unique style.
Choosing Emotes
Your choice of emotes can significantly impact your stream’s vibe. Consider using emotes that reflect your personality or your community’s inside jokes. Are there specific emotes that your viewers spam during hype moments? Add those to your Kappagen setup.
Another tip is to mix standard Twitch emotes with your custom ones. This creates a blend that feels familiar yet fresh. Don’t forget to update your emote list regularly to keep things exciting for your viewers.
Adjusting Display Settings
Display settings play a crucial role in how Kappagen appears on your stream. Start by adjusting the size of the emotes. Larger emotes can make a big impact during key moments, while smaller ones can be less distracting during regular gameplay.
Think about the duration emotes stay on the screen. Shorter durations can keep the energy high, whereas longer durations might be better for celebratory moments. Test different settings to see what works best for your stream.
Also, consider the placement of emotes on your screen. Do you want them to appear randomly, or in a specific area? Experiment with different placements to find the most engaging setup. Your viewers will appreciate the effort you put into making their experience enjoyable.
By customizing your Kappagen, you not only enhance your stream’s visual appeal but also deepen the connection with your audience. What creative touches will you add to make your stream unforgettable?
Troubleshooting Common Issues
Troubleshooting common issues in Kappagen with Streamerbot and OBS can be challenging. But with a few tips, you can solve most problems quickly. This section will address some typical issues you might face.
Connection Problems
A common problem is connecting Streamerbot to OBS. First, ensure both applications are up to date. Outdated versions can cause compatibility issues. Also, check your firewall settings. Sometimes, the firewall blocks the connection between the two programs.
Verify your WebSocket settings in OBS. Go to the OBS settings menu and select the WebSocket server settings. Ensure the WebSocket server is enabled and the port number matches the one in Streamerbot. Double-check the IP address settings as well.
Command Errors
Command errors are another frequent issue. If your commands are not working, start by reviewing your command syntax. Simple typos can cause commands to fail. Also, make sure the command is enabled in Streamerbot.
Permissions settings can also cause command errors. Ensure that the user running the command has the necessary permissions. Check the command triggers too. Sometimes, the wrong trigger can prevent the command from executing.
Lastly, test the command in a controlled environment. Run the command outside of your live stream to see if it works. This can help identify if the issue is with the command itself or the stream environment.
Advanced Tips And Tricks
Mastering Streamerbot and OBS for Twitch is a rewarding experience. Once you’ve got the basics down, it’s time to elevate your Kappagen game with some advanced tips and tricks. Let’s dive into how you can enhance your Kappagen effects and utilize additional plugins to make your streams even more exciting.
Enhancing Kappagen Effects
To enhance your Kappagen effects, start by experimenting with different animations. You can adjust the speed, size, and type of animation to better fit your stream’s vibe. Try combining multiple animations to see what unique effects you can create.
Another way to level up is by playing with the transparency and layering of the Kappagen. This can add depth and make your screen less cluttered. You can also sync the Kappagen triggers with specific audio cues to make the experience more immersive for your viewers.
Don’t forget to engage your audience in the process. Ask them what effects they enjoy the most. This not only makes them feel involved but also helps you understand what works best for your community.
Using Additional Plugins
Streamerbot and OBS have a rich ecosystem of plugins that can take your Kappagen effects to the next level. One plugin that stands out is the ‘Move Transition’ plugin. This allows you to create smooth transitions for your Kappagen animations.
Another must-have is the ‘Shader Filter’ plugin. This plugin lets you apply various shaders to your Kappagen, adding a layer of visual flair that’s sure to impress. It’s amazing how a simple shader can completely change the feel of your Kappagen.
Always keep an eye out for new plugins and updates. The community around Streamerbot and OBS is constantly evolving, and staying updated can give you new tools to enhance your streams. What new plugin have you discovered recently that changed the way you stream?
Frequently Asked Questions
What Is The Kappagen Command On Twitch?
The Kappagen command on Twitch triggers a burst of Kappa emotes on the screen, enhancing viewer engagement and fun.
How To Use Kappagen?
To use kappagen, log in to your account. Select the desired kappagen effect. Customize settings and click “Activate. ” Enjoy your new effect!
How To Put Twitch Key In Obs?
To put your Twitch key in OBS, open OBS, go to “Settings,” select “Stream,” choose “Twitch,” and paste your Stream Key. Save changes.
How To Add Twitch Elements To Obs?
To add Twitch elements to OBS, open OBS, click “Add Source,” select “Browser,” and paste the Twitch URL. Adjust settings as needed.
Conclusion
Setting up Kappagen in Streamerbot for Twitch and OBS is straightforward. Follow the steps. Customize your alerts. Engage with your viewers. Make your streams more interactive. Have fun experimenting with different effects. Practice makes perfect. Soon, you will be a pro at using Kappagen.
Enjoy streaming with Streamerbot and OBS. Your audience will love the new interactions. Happy streaming!